
Kodi
Updated: August 01, 2026
Installation
Kodi is a free, open-source media center available for Windows, Android, Android TV, macOS, Linux, and Raspberry Pi.
It supports M3U playlists, electronic program guides (EPG), and catch-up TV.
Kodi is best suited for advanced users looking for a highly customizable media center with extensive configuration options.
Windows
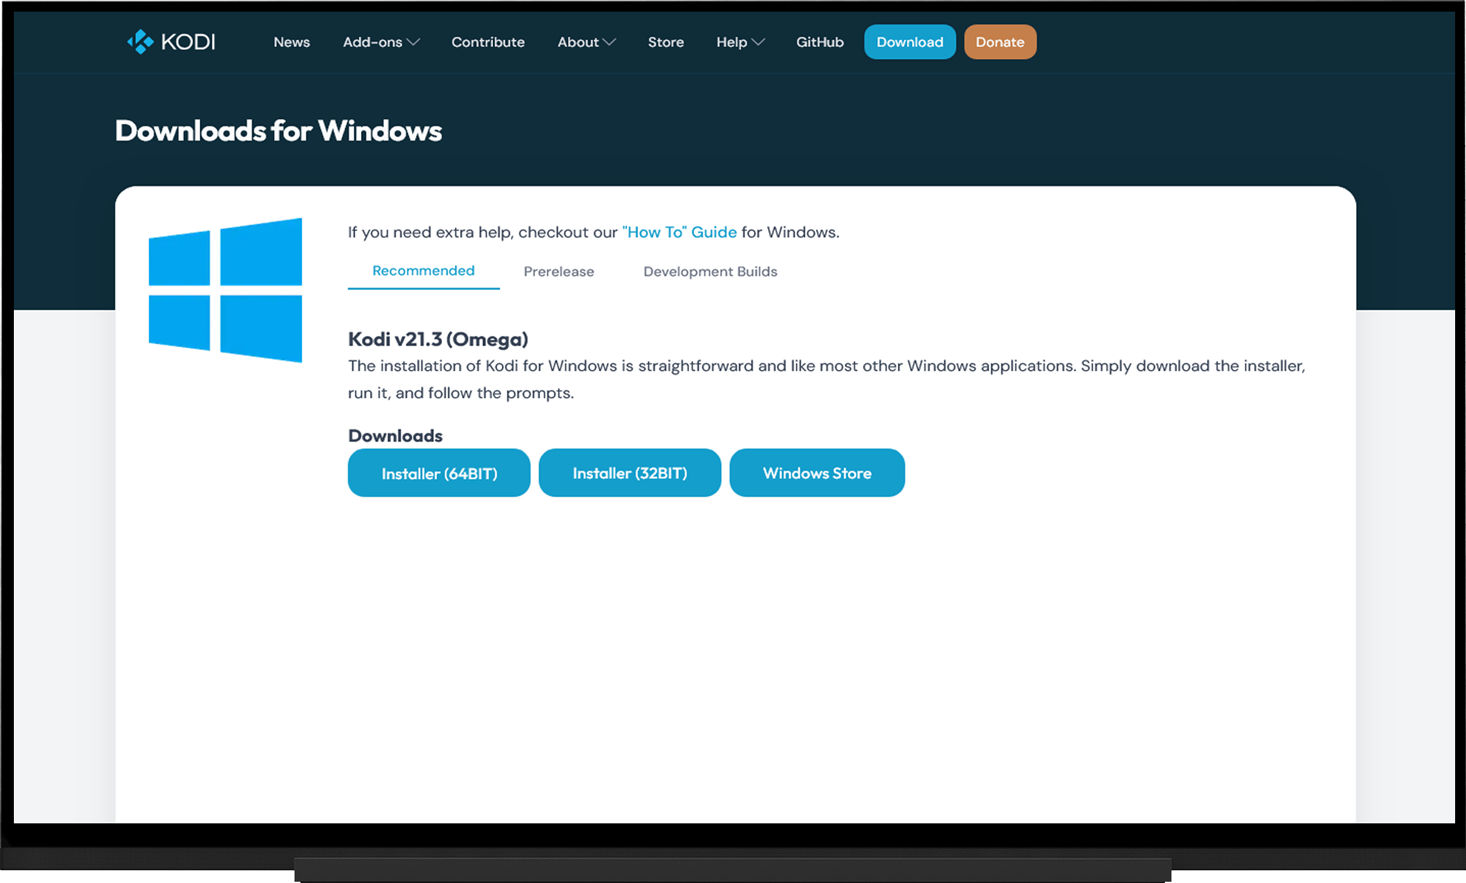
- Download the installer from the official Kodi website or install the application from the Microsoft Store
- Run the installer.
- Follow the installation wizard.
- Once the installation is complete, launch Kodi.
Android / Android TV
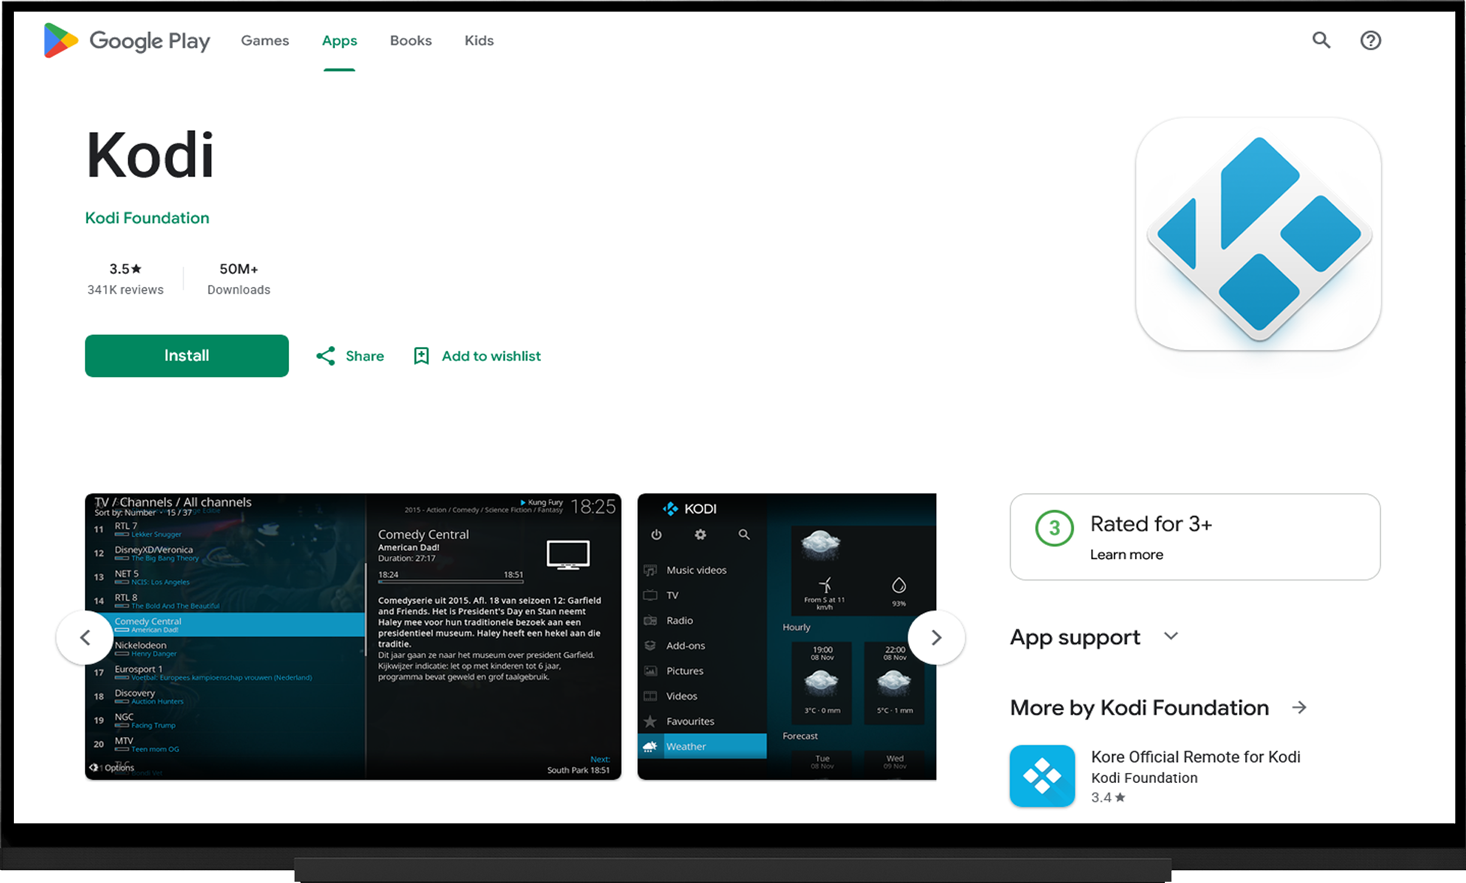
Install the application from one of the following app stores:
- Google Play
- Huawei AppGallery
- Alternatively, you can download the .apk file from the official Kodi website
macOS 10.14 or later
- Download the .dmg file from the official Kodi website
- Open the downloaded file and drag the Kodi icon into the Applications folder shown in the same window.
- Wait for the files to finish copying.
- Open the Applications folder on your Mac.
- Launch Kodi. If macOS displays a security warning, click "Open".
Installing IPTV Simple Client
Important: The Kodi developers strongly recommend disabling all installed PVR add-ons before installing IPTV Simple Client.
Go to:
- Settings.
- Add-ons.
- Install from Repository.
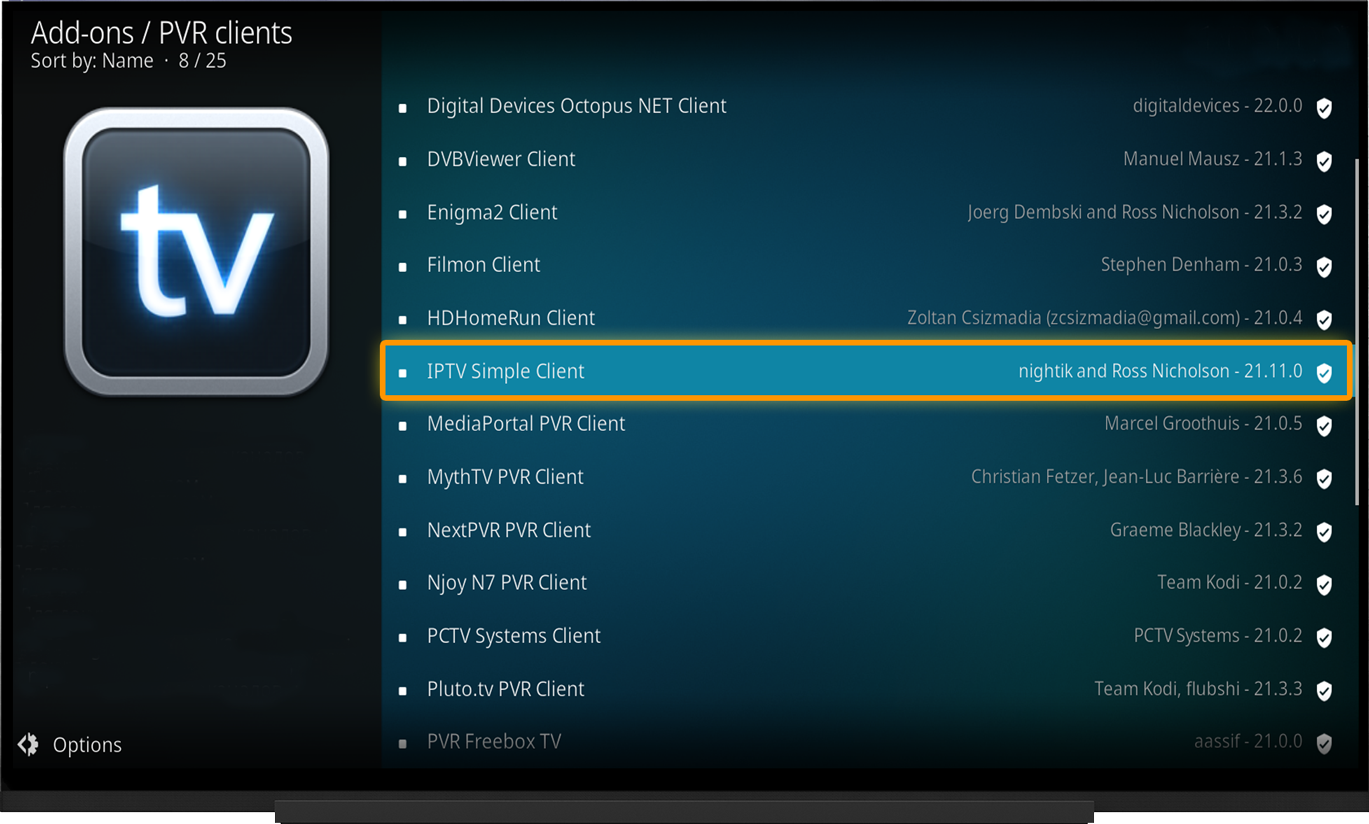
- PVR Clients.
- IPTV Simple Client.
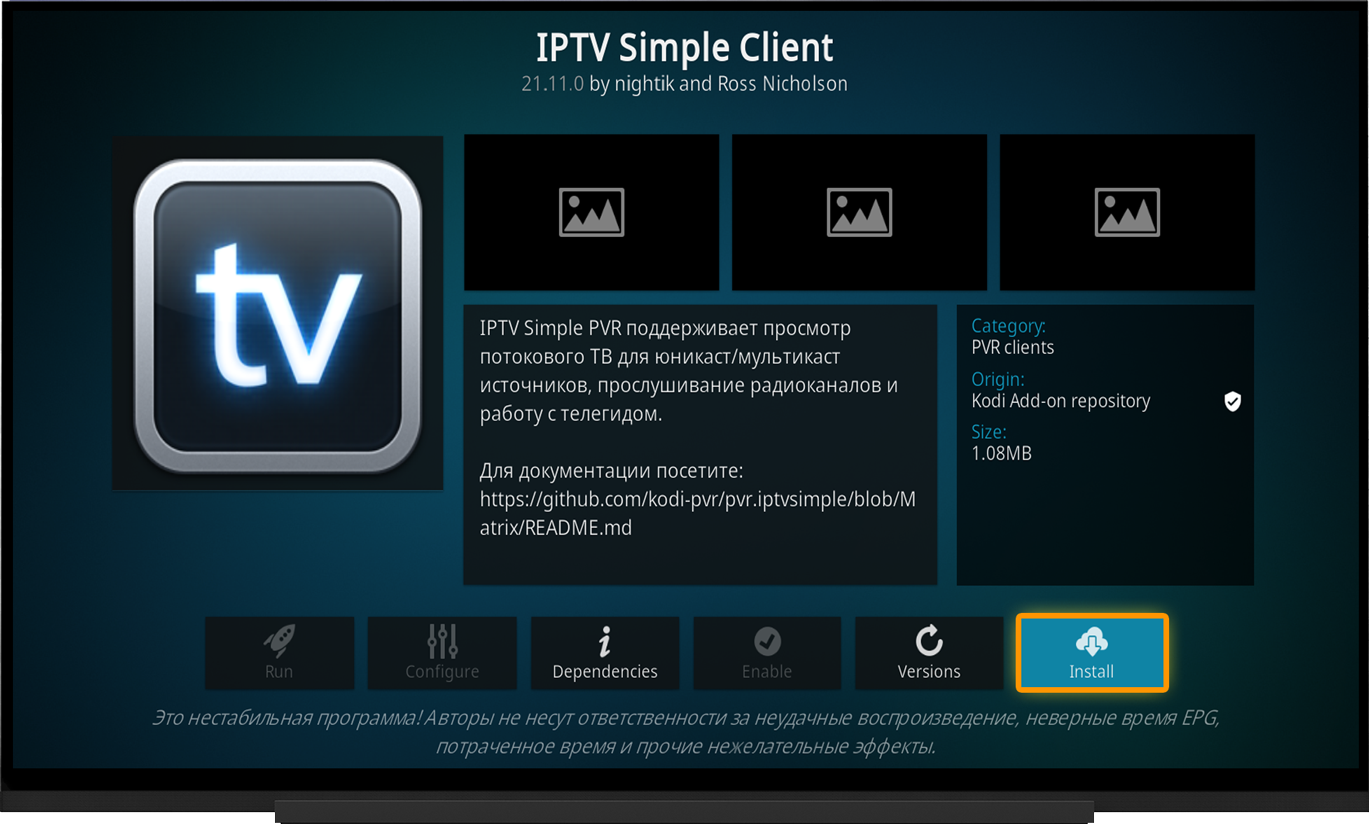
- Install the add-on.
- After the installation is complete, select "Configure".
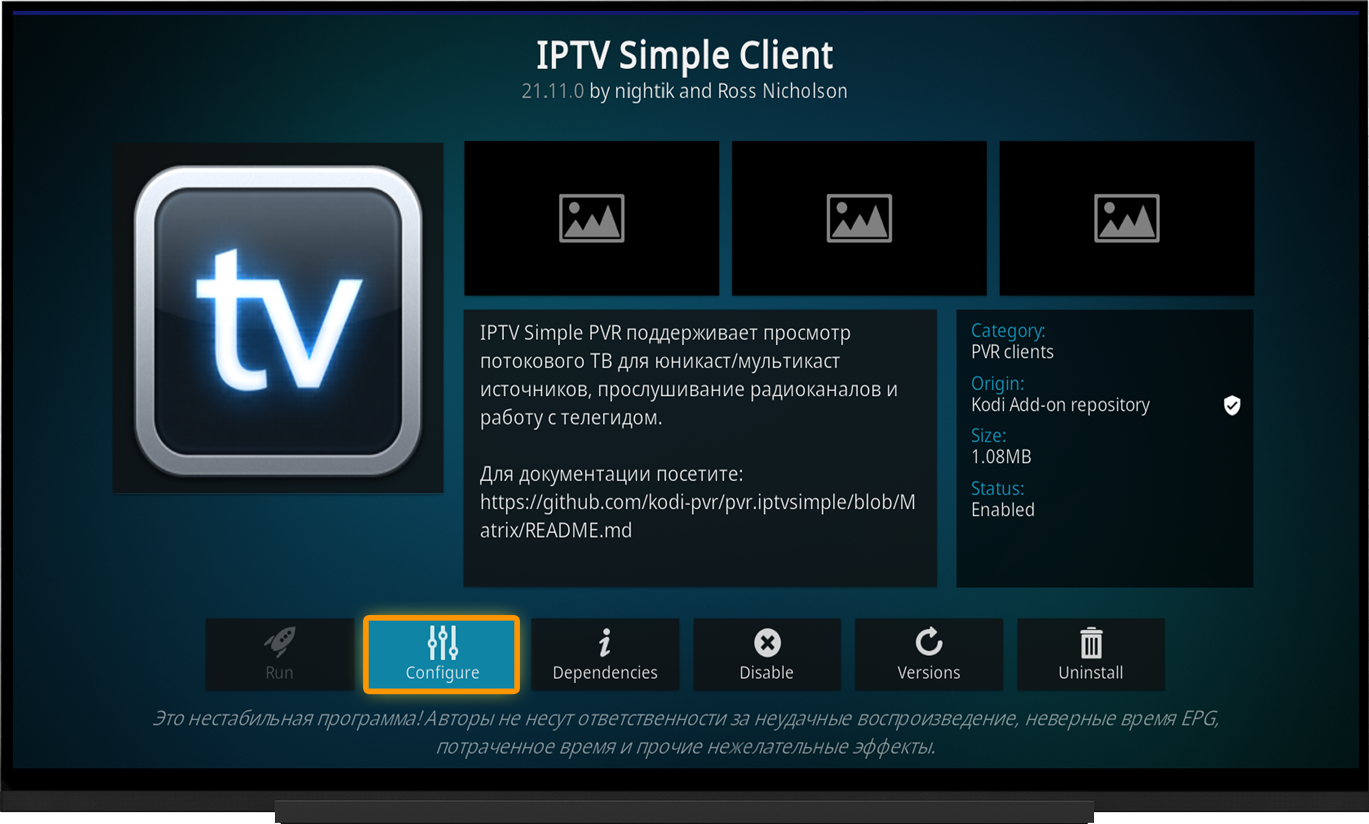
Adding a Playlist
Method 1: Playlist URL.
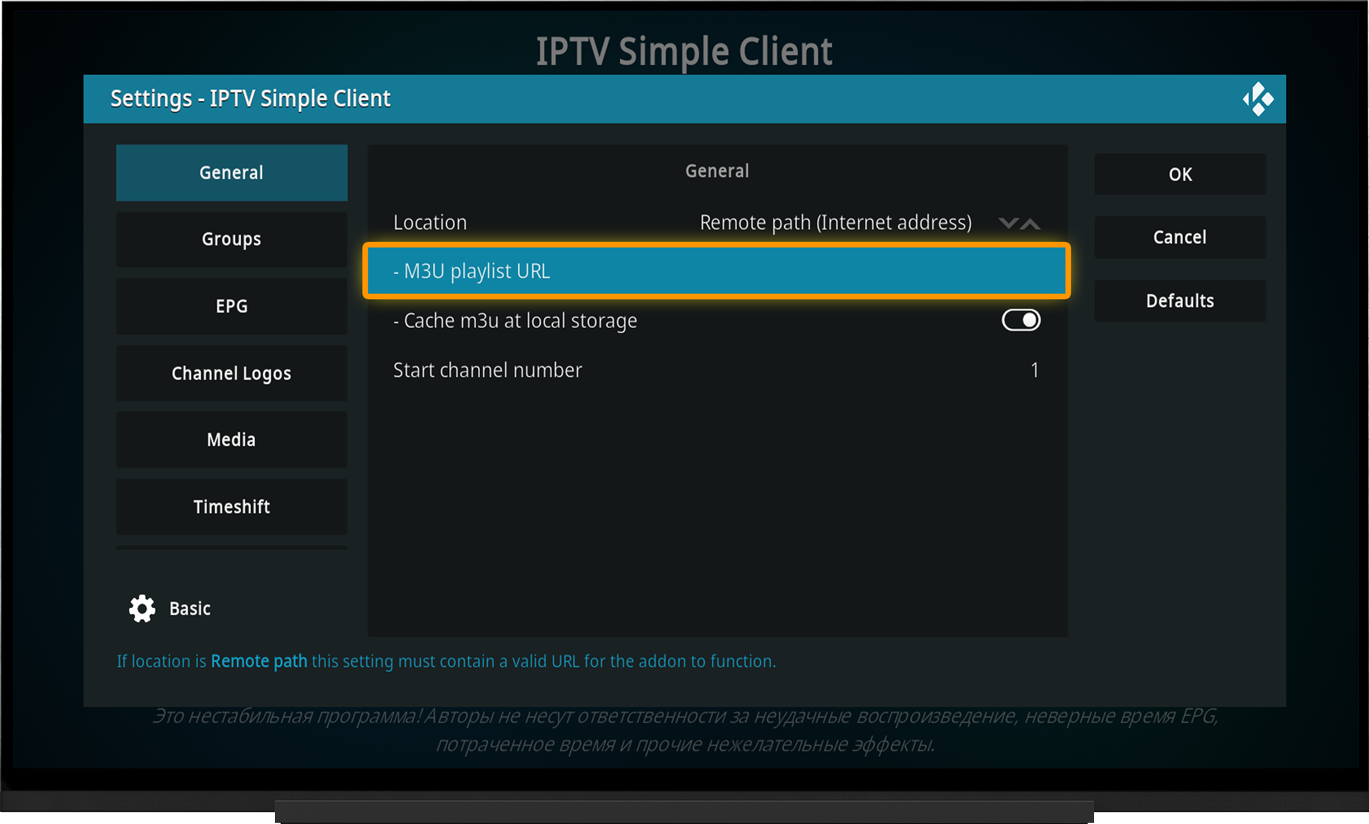
In the "General" section:
- Set "Location" to "Remote Path (Internet Address)".
- Paste the direct M3U playlist URL into the "M3U Playlist URL" field.
- Click OK.
Method 2: Local Playlist File.
In the "General" section:
- Set "Location" to "Local Path".
- Select the location of the M3U playlist file saved on your device.
- Click OK.
Note:
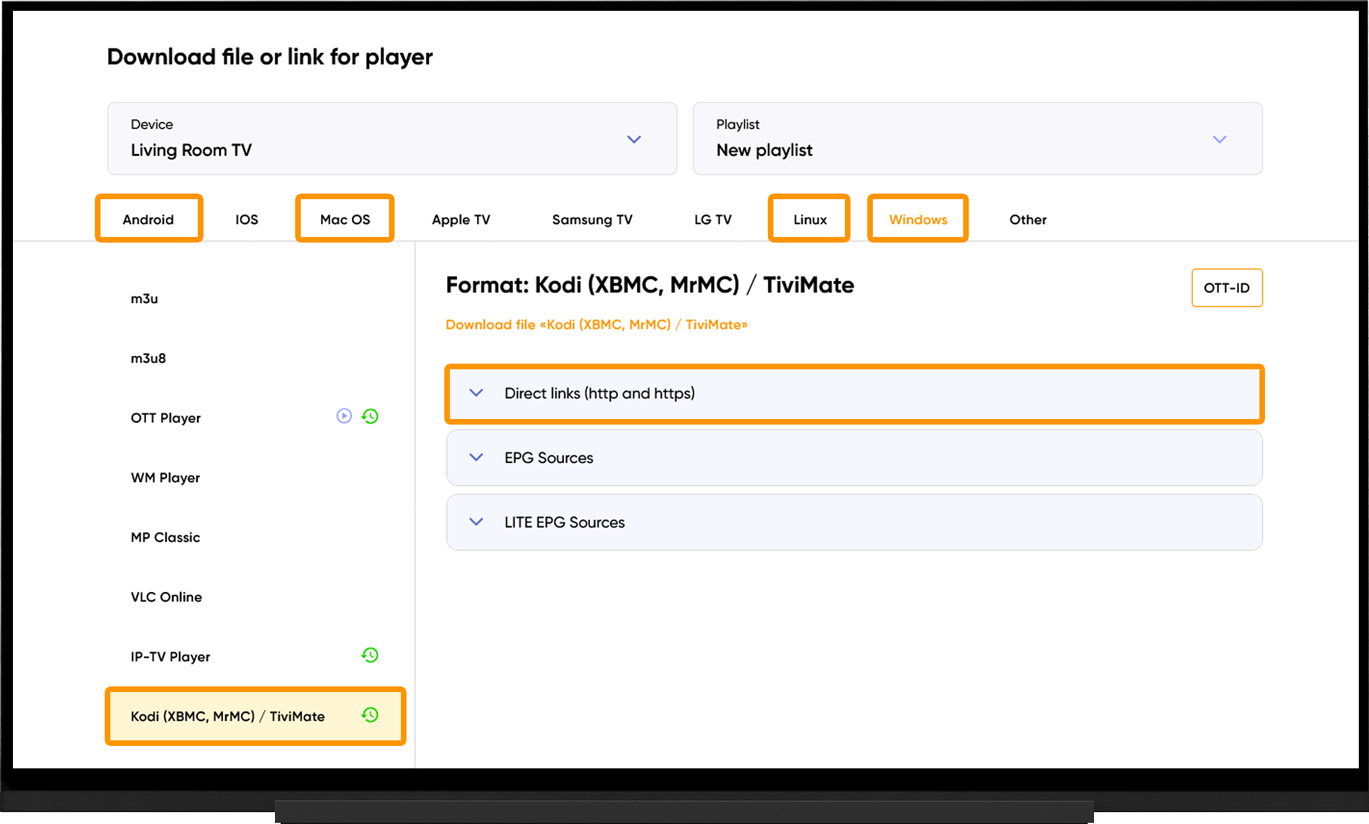
To get the playlist link or playlist file, go to the My Devices section and click "Download" next to the device name:
- Select your device type.
- Choose "Kodi (XBMC, MrMC)".
- Under "Direct Links (HTTP and HTTPS)", either copy the playlist link or click "Download File", depending on your preferred playlist format.
Catch-up TV
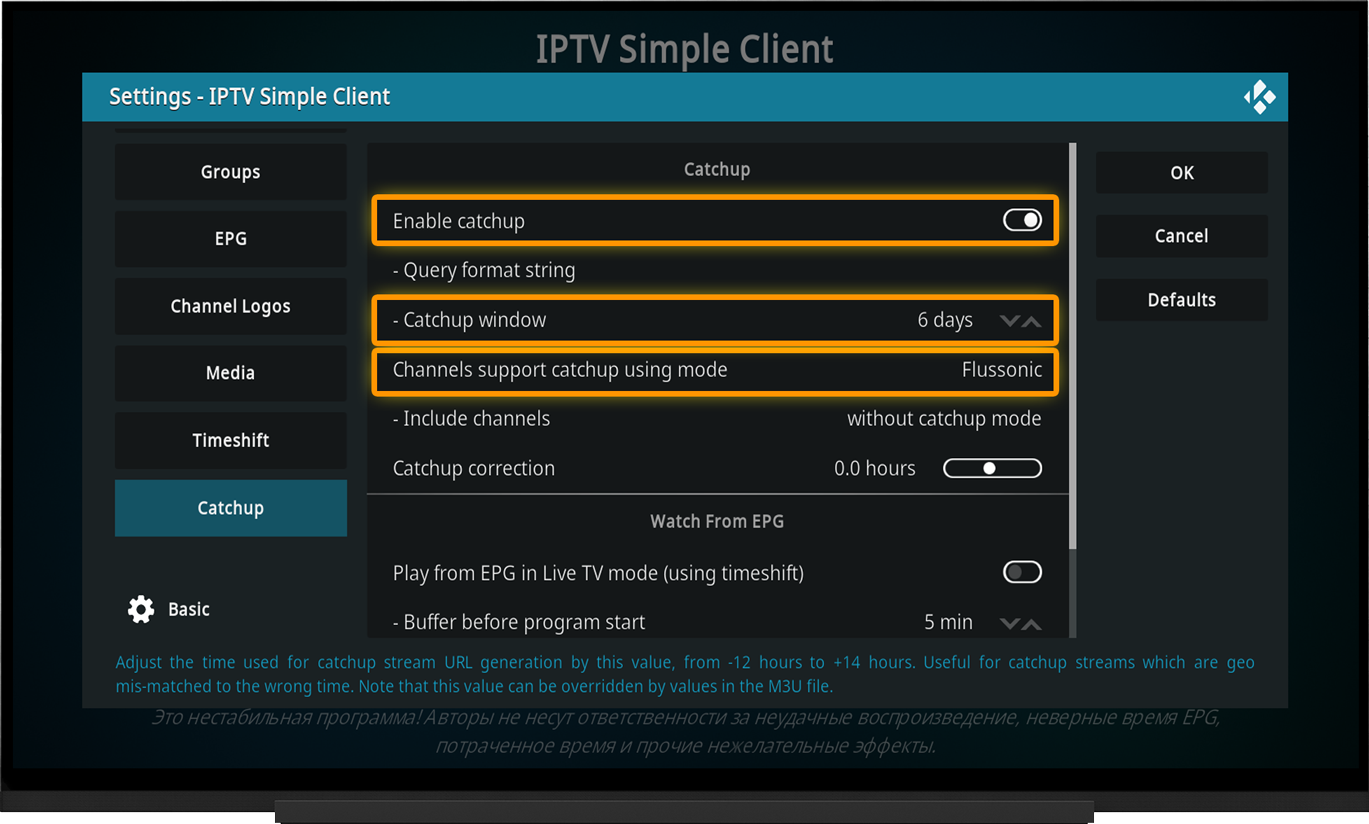
In the IPTV Simple Client settings, open the "Catch-up" section (located at the bottom of the settings list):
- Enable Catchup.
- Set the "Catchup window" to 6 days.
- Set the "Catchup support using mode" to Flussonic.
- Click OK.
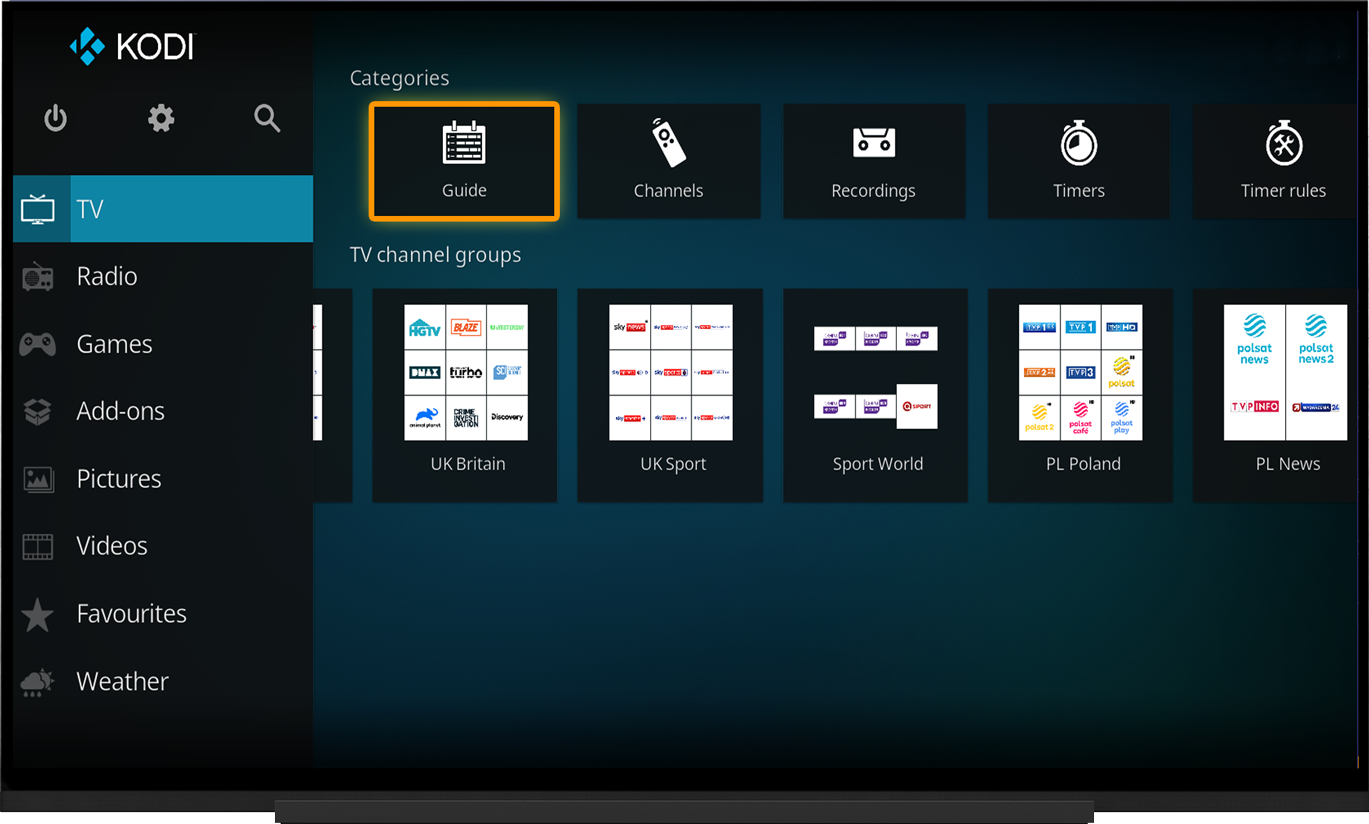
To access catchup recordings, go to the TV section, select "Guide", then choose the desired channel and recording.
EPG (TV guide)
When using the correct Kodi playlist URL, there is no need to configure additional EPG settings.
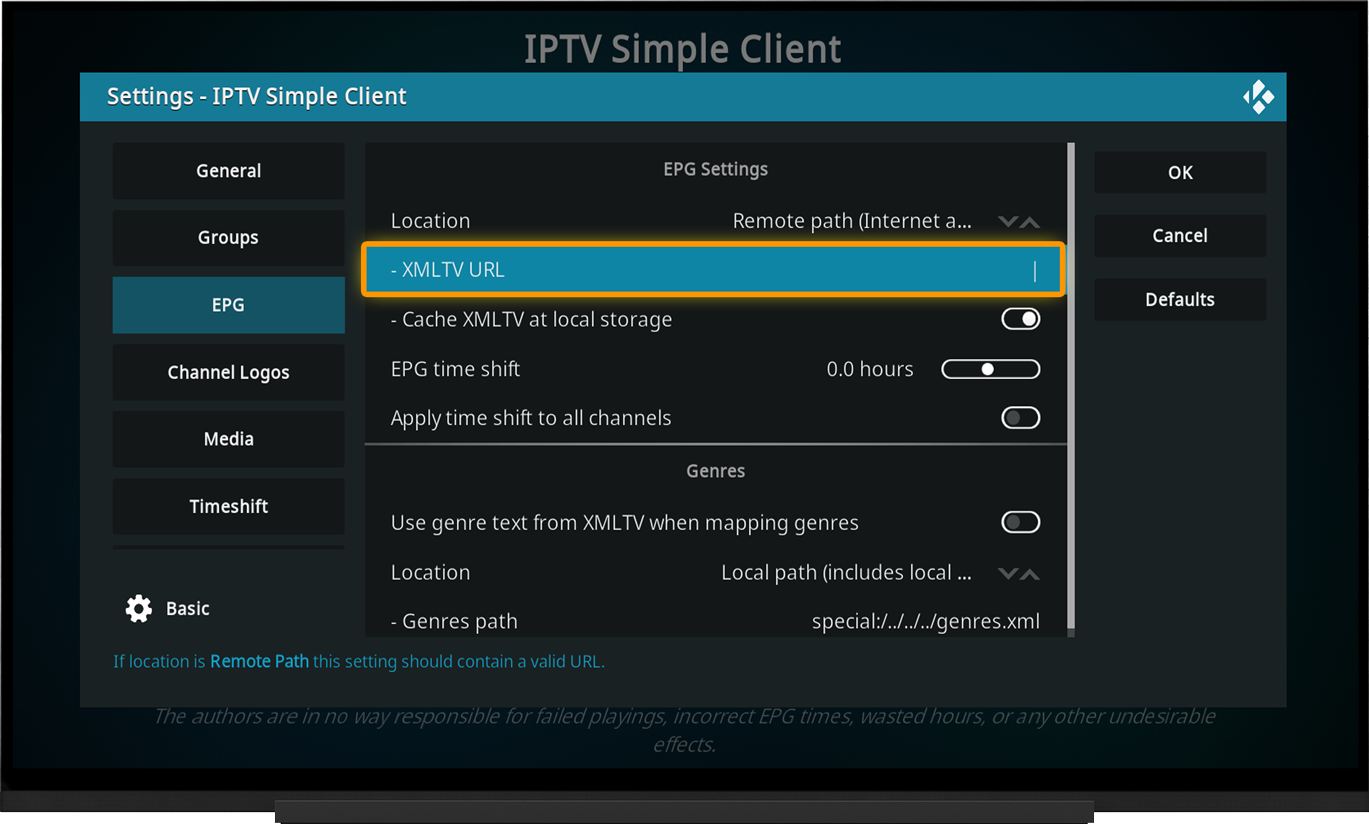
If you used a different playlist type for setup, you may need to add an EPG source URL manually. To do this, open the EPG section in the IPTV Simple Client settings:
- Set "Location" to "Remote Path (Internet Address)"
- In the "XMLTV URL" field, enter the EPG source URL.
- Click OK.
Note:
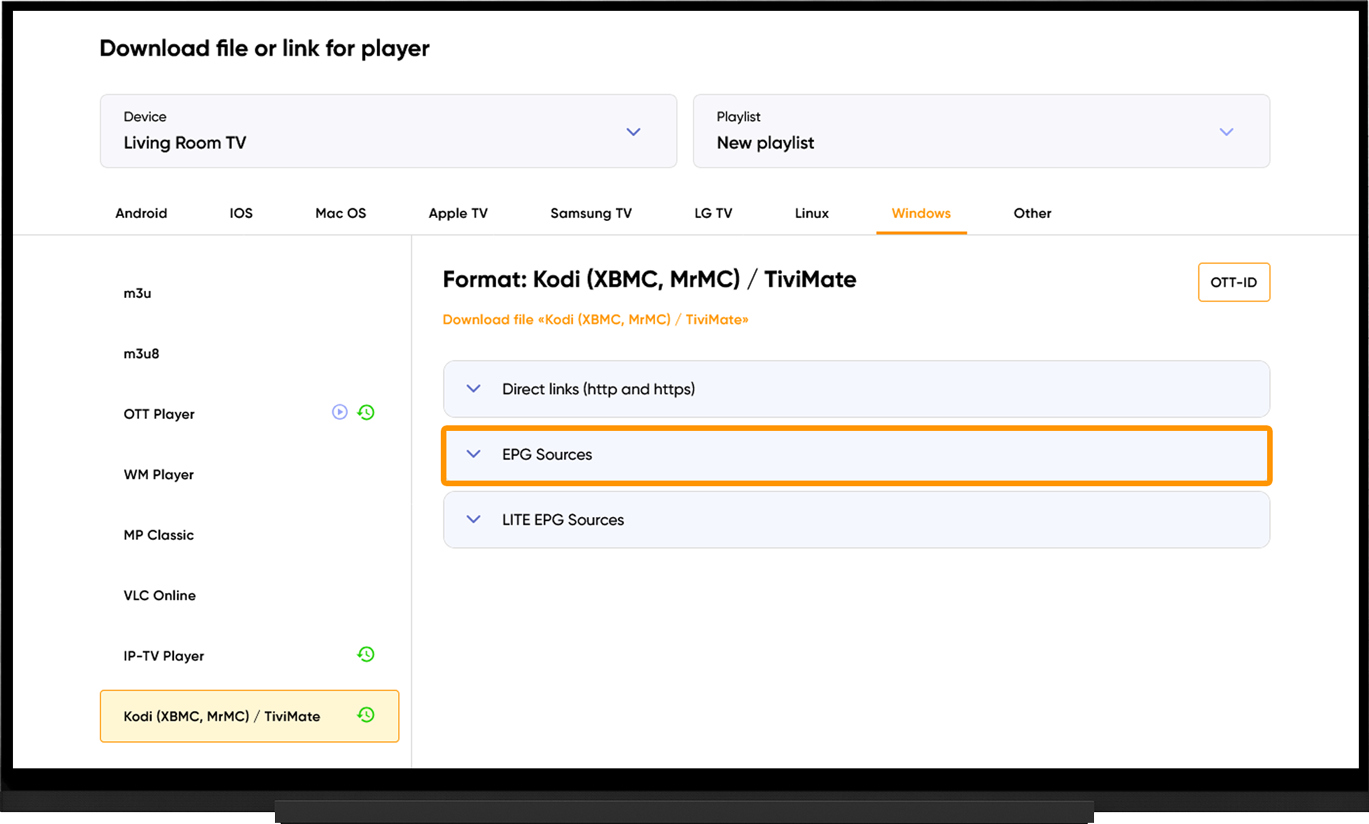
To get the EPG source URL, go to the My Devices section and click "Download" next to the device name.
On the playlist download page, expand the "EPG Sources" section.
Frequently asked questions
1. Channels are not loading (empty channel list after setup)
Reason:
- The playlist URL or file path is incorrect.
- The selected location type does not match the playlist source.
Solution:
In the PVR IPTV Simple Client settings → "General".
- Check the "Location" setting:
For a direct playlist URL, select "Remote Path (Internet Address)".
For a playlist file stored on a USB drive or device memory, select "Local Path". - Check the playlist URL (case sensitivity, no extra spaces at the end).
2. Channels are loaded, but the TV guide (EPG) is empty
Reason:
- XMLTV is not configured.
- The EPG source URL is incorrect.
Solution:
In the PVR IPTV Simple Client settings → "EPG":
- Set "Location" to "Remote Path (Internet Address)" and enter a valid XMLTV source URL in .xml or .xml.gz format.
- Go to Kodi Settings → PVR & Live TV → "General" and select "Clear data". This will force the TV guide to reload.
- Use our dedicated Kodi playlist, which already includes the EPG source and all required attributes.
3. EPG time is ahead or behind the actual schedule
Reason:
- The time zone difference between your region and the EPG source server.
Solution:
In the PVR IPTV Simple Client settings → "EPG":
- Adjust the "EPG Time Shift" value.
- Set the required offset (for example, +3 or -2) to match your local time.
4. Streams stop or freeze every few seconds/minutes
Reason:
- Kodi cache/buffering issues.
- Unstable connection to the router.
- Unstable connection to the selected server.
Solution:
In the PVR IPTV Simple Client settings → "General":
- Enable "Cache M3U at local storage".
- Connect the device to the router using an Ethernet cable or use a 5 GHz Wi-Fi network if issues occur on 2.4 GHz.
- Run the server selection test, switch to the optimal server, and restart Kodi after 10 minutes.
5. Kodi freezes during "Importing TV guide data"
Reason:
- A large XMLTV file overloads the device's CPU or memory.
Solution:
In the PVR IPTV Simple Client settings → "EPG":
- Enable "Cache XMLTV at local storage".
- Use the lightweight "Lite" EPG source without detailed programme descriptions.
To get the EPG source URL:
Go to the My Devices section and click "Download" next to the device name. On the playlist download page, expand the "Lite EPG Sources" section. - In Kodi Settings → PVR & Live TV → "Guide", increase the EPG update interval (for example, to 12 or 24 hours) to prevent Kodi from rebuilding the database at every startup.
6. "Could not find PVR add-ons" error during installation
Reason:
- Some unofficial or "clean" Kodi builds (especially on Linux/Ubuntu) do not include PVR clients by default.
Solution:
For Android / Windows:
- Make sure you are searching for the add-on in the official Kodi repository:
Add-ons → Install from Repository → PVR Clients.
For Linux (Ubuntu/Debian):
- Install the add-on through the terminal using the command:
sudo apt install kodi-pvr-iptvsimple